|
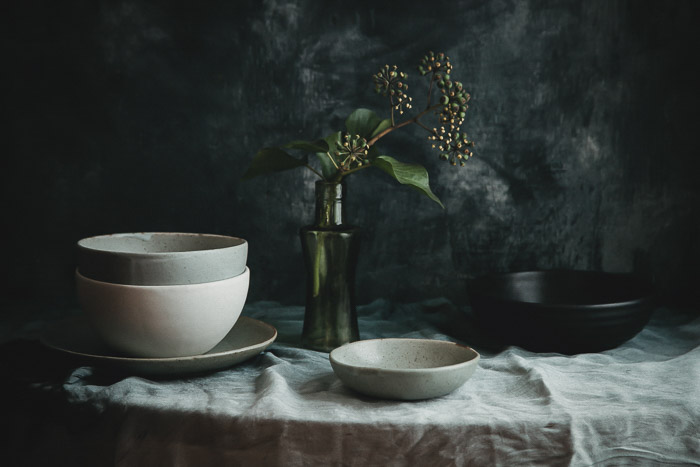
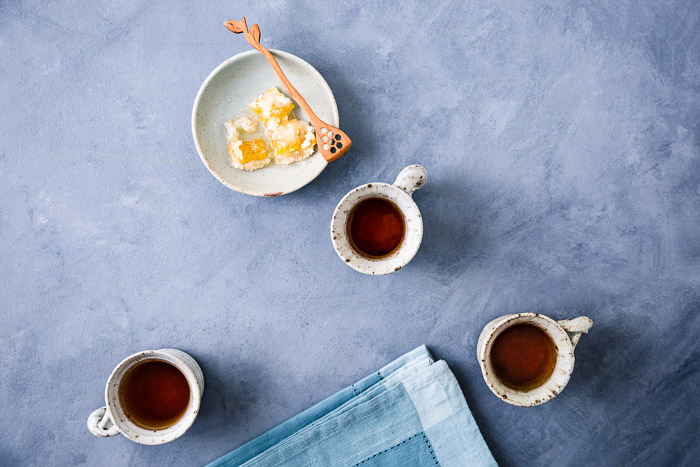
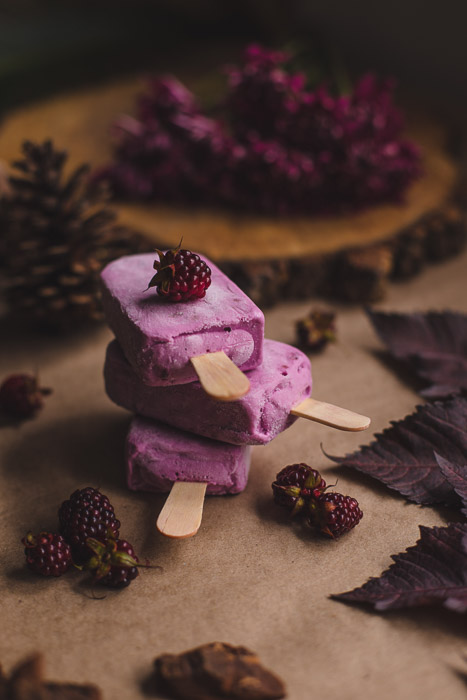
Still life photography is excellent for expressing your creativity. It can also make you money through stock photography or sales of art prints. The great thing about still life photography is that you don’t need a fancy studio or a lot of space. To start, all you need is a table by a window.  
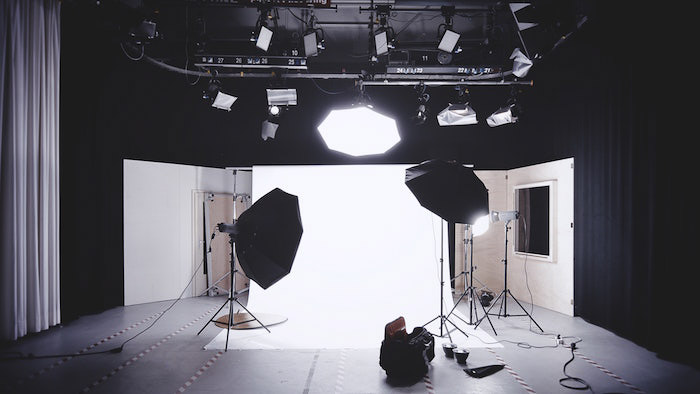
What Is the Best Lens for Still Life Photography?As with any genre of photography, having the right lens to suit the subject you are shooting is crucial. You don’t need a big assortment of lenses to do still life photography. A couple will do the trick. If you’re shooting on a full-frame camera, I suggest starting with a 50mm. You can do flat lays and tablescapes, and straight-on shots with this lens. When it comes to still-life photography, a 50mm lens is considered a wide-angle. If you’re only shooting one or two objects, or if your subject is small, there will be too much background in your shot. You’ll also have to get very close to your subject to get rid of what you don’t want in the shot. The scale is an important aspect of still life photography. Some objects can look a lot bigger or taller to the camera. A lot of background in your shot can dwarf your subject. To shoot still life straight-on, I recommend a 100mm macro lens. A macro lens isn’t just for tight, close-up shots. When you’re shooting with a longer lens, you only see the subject and the surface that it’s placed on. If you move farther back from your subject, it’s perfect for portrait style shots. I often shoot still life photos at 70mm or higher on my full-frame camera. If you have the budget, then a 24-70 zoom lens is another great one to have in your kit. A zoom lens is not as sharp as a prime lens, but I have one in Canon’s L-Series, and it’s very sharp. It’s worth the hefty price tag. If you’re serious about selling your still life photography, then you need sharp, high-resolution shots. This is where the more expensive lenses come in. Use Lighting to Bring our the Best in Your ImagesIf you’re shooting product photography, you will need an artificial lighting system. For editorial style photography, natural light will do you fine. You don’t need to invest in a lot of equipment right off the bat. In fact, you may never need to invest in a lot of equipment. It all depends on what your end goal is. There are excellent photographers who work with natural lighting in every genre. The key to successful still life photography is learning how light works. Sculpting the light to do what you want is a skill. When shooting straight-on, have your lighting coming from the left side, if possible. Having the light on the left helps lead our eye through the image. The eye is first attracted to lighter and brighter parts of the frame. Do an experiment where you take a shot of a set-up with the light on your left. Then take another shot with the light coming from your right. Notice how the light affects your scene differently. To get the most out of the natural light, be sure to work with reflectors and bounce cards. You will need to redirect some of the light back into your scene. Natural lighting, in particular, falls off quickly. You can buy a 5-in-1 reflector kit that comes with gold, silver, black, and white reflectors. These usually come with a diffuser, which is key for softening hard or direct sunlight. If you don’t have the budget for a diffuser, try hanging a sheer white curtain in front of your window. You can also buy some pieces of white and black cardboard or poster board. These are inexpensive and can help you shape the light to how you want.
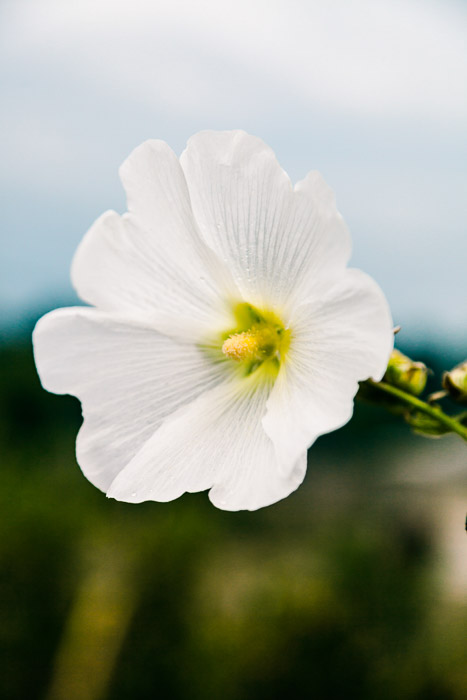
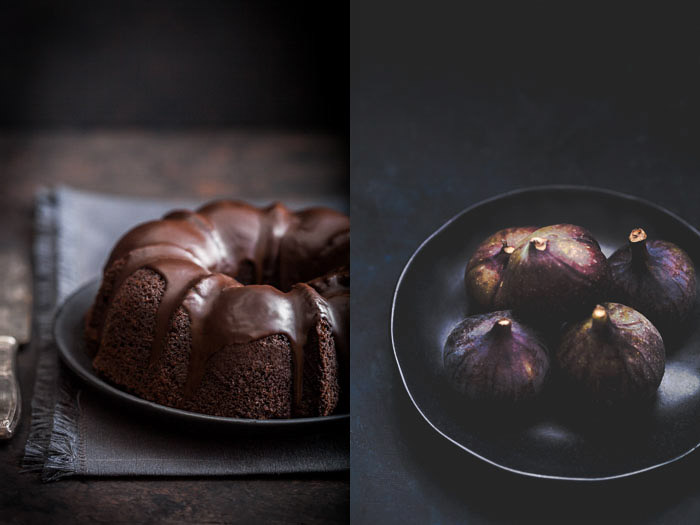
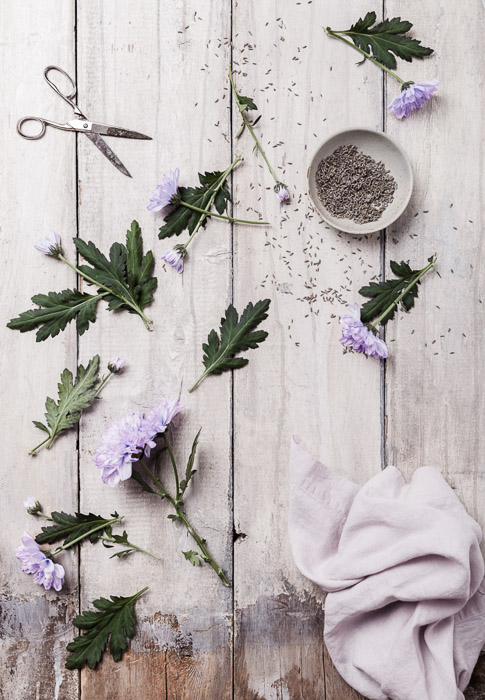
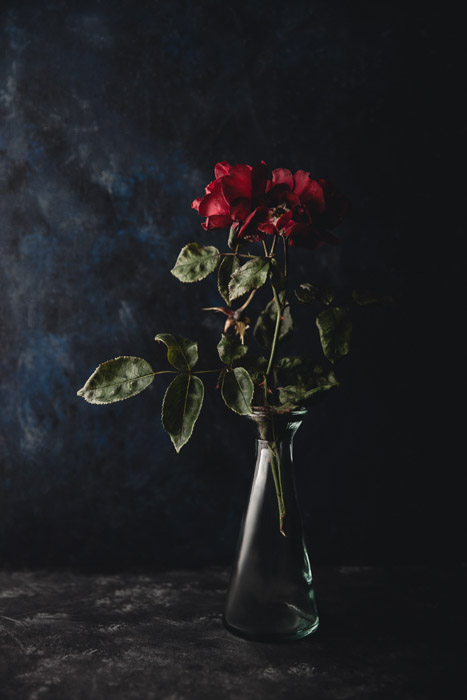
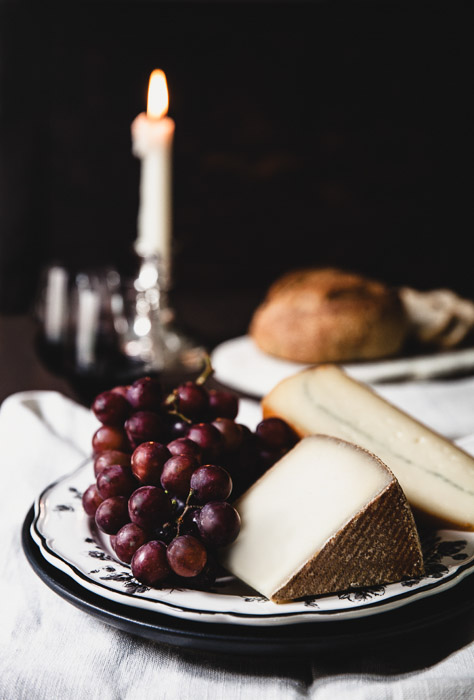
Use a Tripod for ConsistencyWorking with a tripod is a must when it comes to still life photography. Still life is a slow and deliberate process of building and assessing. Working with a tripod frees up your arms to work more carefully and efficiently. It also helps you maintain the same position from shot to shot. This is important if you’re working on a series of still life photos. Be sure to move your tripod around and try shooting from different angles. Working with a tripod doesn’t mean you need to have it in the same place all the time. The great thing about hand-holding your camera is that it can be more freeing. Bring some of that same freedom into working with your tripod. Try different heights and angles. You can move around your set if need be, but just be sure not to cast a shadow onto your scene. You can also get an extension arm for your tripod. This way, you can hang your camera over your set-ups for flatlays. Overhead shots have a more graphic quality. These are great for fitting several elements into a scene. The angle flattens everything and diminishes depth. Having a shutter release is also useful. When photographing still life in natural light, you may have to use slower shutter speeds. Even when you’re on a tripod, pressing the shutter can create a minute vibration. This may introduce camera shake into your images and prevent them from looking sharp. A shutter release can prevent this. If you’re shooting tethered in Lightroom, you can also use the program to activate the shutter. Find Unique Props for Still Life PhotosThe right prop can enhance your still life photography ideas. You will already have many household items that can be used for props, such as old books, teapots, or glasses. Look around your home and think about the items you have and how you can put a few together to make a story. Make sure that the props you use work together visually. For example, if you’re doing a vintage look, keep everything vintage looking. Don’t use shiny flatware in rose gold alongside an antique silver tray. It may look pretty, but visual storytelling is not all about creating something beautiful. You also need to be cohesive. Flowers can be considered a prop and add a beautiful touch to flatlays or lifestyle-based photography. They can be photographed on their own to create beautiful floral still life pictures. Think about texture and colours when choosing your props. I recommend that most of your props be neutral. They will work together for many shots, and you can get a lot of use out of them. Sometimes if a prop is too colourful it can draw the eye away from the main subject. Shiny items can be quite problematic in still life photography. Product photographers can take a whole day to get one decent shot of a shiny kitchen appliance. This is because the shine reflects all the surroundings. These reflections take time to manage and can be difficult. You might have already noticed this if you have shot cutlery or glassware of any sort. There is a product on the market by Krylon called “Dulling Spray” that can be found at craft stores. You can spray it on these items to reduce the glare. Keep in mind that doing so makes these items no longer food safe. Personally, I keep my props separate from my everyday kitchen items. Use the Right BackgroundWhether you’re shooting from overhead or straight on, you will need a proper background for your still life photography. There are companies that sell professional backgrounds for food and still life photography. You can also make your own with a bit of elbow grease and ingenuity for a fraction of the price. This is another area where you can unleash your creativity. The possibilities are endless. One of my favourite backgrounds for still life photography are pieces of painted canvas. You can buy a large canvas painter’s drop cloth and some paint samples from the hardware store. These create backdrops with a beautiful and subtle texture. They are inexpensive and can be rolled up and stored away easily. You can also buy sheets of pine wood or laminate and paint them. Search online for “paint effects” to give you ideas about textures and colour combinations you can use. I’m partial to a concrete look, or three or four colours layered on top of one another. Thin pieces of wood can be painted and placed together. It mimics the look of a picnic table, as in the image above. It’s best to use backgrounds in neutral or subtle colours that will not overpower your subjects. It will also mean that your backgrounds can be used in many ways. Plan Your ShootPhotography can get technical. We sometimes lose sight of the artistic side. Take your time to think about the visual story you want to tell and the best way to execute it. I like to do sketches and keep all of my photo ideas written down in a book. Having a rough idea in your head of what you want your final image to look like. A certain vision may mean sourcing or purchasing props or fabric, or botanical elements. Another fun approach is to grab a few random items. See if any of them work together to create a visual story! But again – keep it cohesive. Implement Compositional Theory to Still Life PhotosThe rules of composition are not really rules; they’re more like guidelines to help you take better pictures. Art is highly subjective. A picture can still be amazing even if it doesn’t fall into a prescribed aesthetic. That said, the best photographs usually do follow compositional theory in some way, whether it’s intentional or by accident. Take the time to study composition for still life photography ideas. Artbooks are particularly good for this. Still life photography is a genre which closely follows painting. When it comes to composition, a particularly useful concept to get intimately familiar with is the Golden Ratio. This is a mathematical concept that expresses a phenomenon of symmetry found in nature. When implemented in art and design, it helps create compositions that are pleasing to the eye. Several post-processing programs have compositional grids that express the Golden Ratio. You can overlay these on your still life photo to help your cropping. Or even use them in creating your compositions if you’re shooting tethered. Remember that colour is also an important aspect of still life composition. Refer to the colour wheel to help you plan your colour schemes. Colours that are opposite on the colour wheel, like blue and orange, are complementary colours. Colour can also be an important part of your still life photography style. If you look at the most popular accounts on Instagram, you’ll see that most have a consistent colour palette. Develop Your EyeEvocative still life photography depends on a strong aesthetic. The more you do something, the better you get at it. This is true with photography. Practice is important. Observe the textures in the world around you. Study the paintings of the Old Masters. Notice the lighting in the works of Vermeer and Caravaggio, or the compositions of Cezanne. Studying the form, colours, and various shades used in still life painting will help you enormously in your still life photography. Becoming visually fluent involves constant and careful observation. Get Creative With EditingAdobe Lightroom can give you all you need to make unique and beautiful still life photos. I don’t recommend them for food shots, but Lightroom presets or Photoshop actions can be useful to create a workflow. This will cut down on the time that you spend in front of the computer. If you’re working in Lightroom with some presets you like, study the settings to understand how they affect elements of the image. Presets can also be a great starting point that you can tweak to your individual taste and aesthetic. We have a great article on using for focus stacking for still life photography you can check too. Post-processing your still life shots can be quite involved, depending on what genre of still life you’re shooting. Editing food requires subtlety to keep it looking appetising and real. But florals or images suitable for art prints allow you to get really creative with your colours and tones. To learn more about Lightroom, try our Effortless Editing course. ConclusionThe most important thing to remember is to take your time! Still life photography is not something to undertake while the clock is ticking. I find that when I’m in a rush or just shooting to get it done, my flow is off and my pictures don’t turn out the way I want them to. Set aside enough time to work your angles and play around with your still life photography ideas. When in doubt, keep it simple. Sometimes the most beautiful compositions are the most minimal. Looking for some creative still life ideas? Check out our water splash photography tutorial for fun food photos!
Save this article to your Pinterest profile to access it later!

via RSSMix.com Mix ID 8230553 https://ift.tt/2LRzrKq
0 Comments
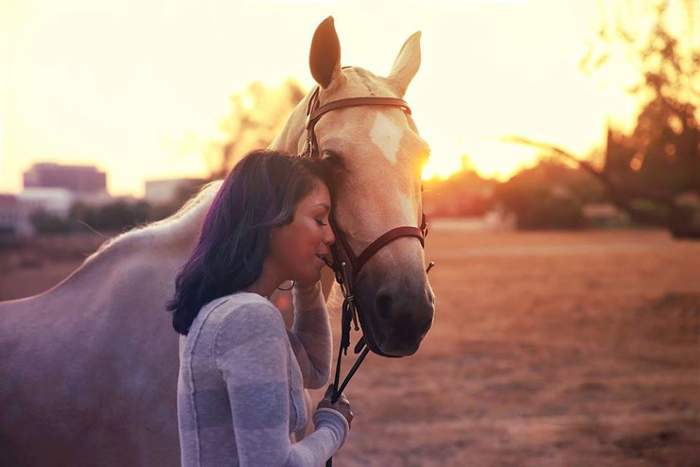
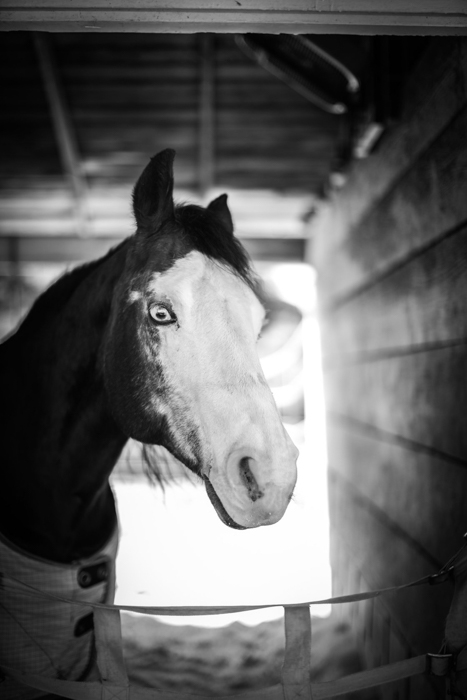
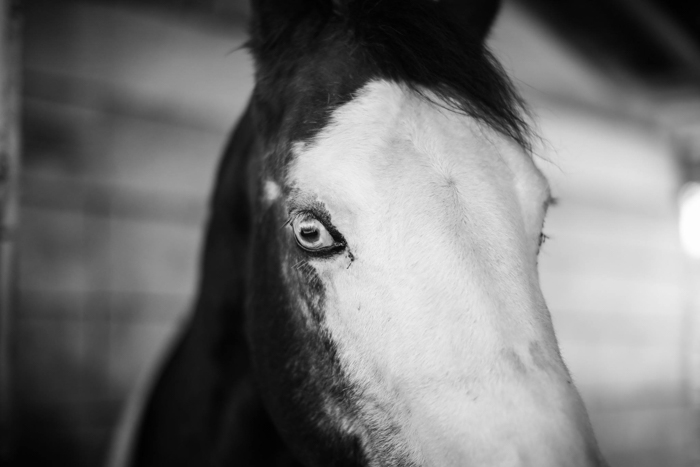
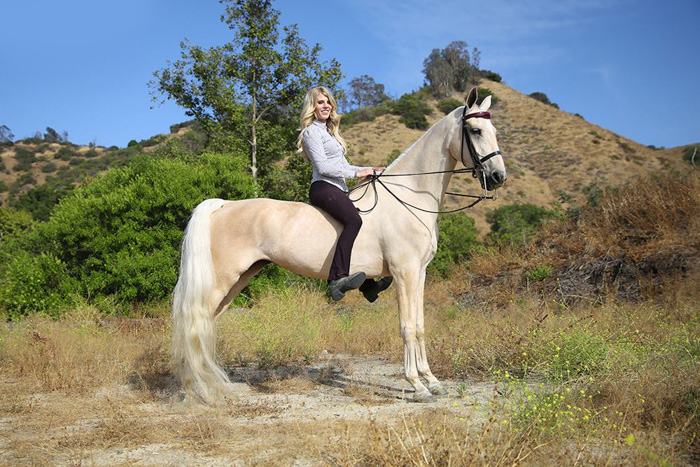
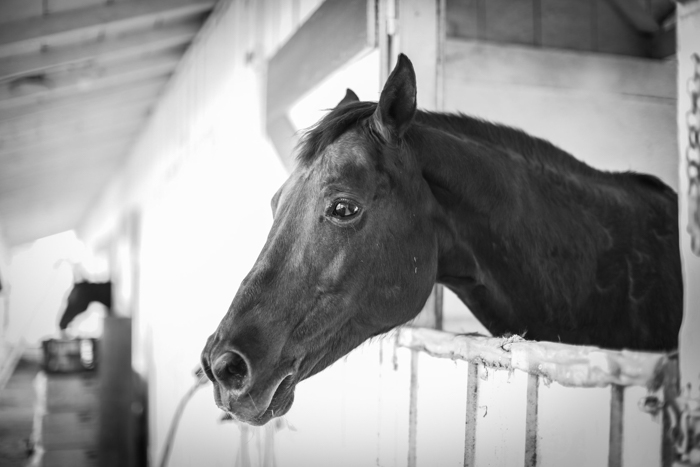
Unlike other pet photography, horses require a different approach when photographed. Here are our ten tips for horse photography!  
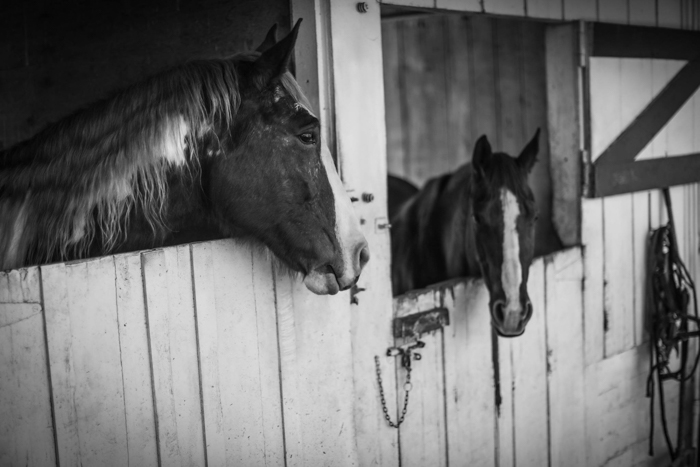
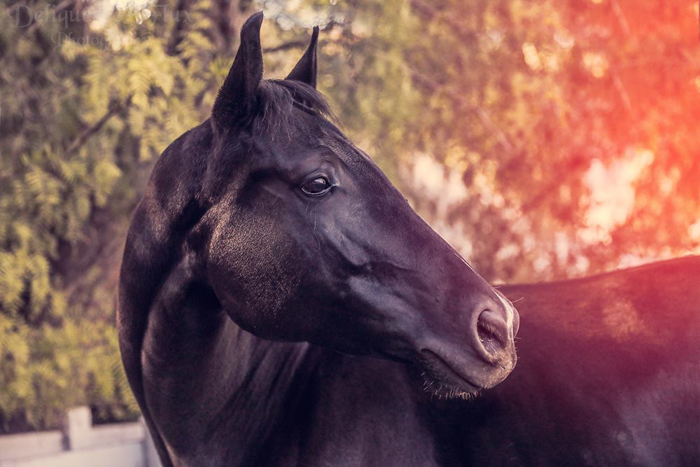
10. Become Comfortable With HorsesAnimals pick up on your emotions, especially intuitive creatures as horses. Your response to them will affect their response to you. 9. Safety FirstSafety is also of the utmost importance. Safety goes both ways. You have to ensure that you are protected and that the horse is as well. 8. Choose Equipment to Compliment ProportionsSpeaking of lenses, with animals as large as horses, you have to choose gear that compliments their proportions. There is a heavy focus on the proper positioning and the aesthetic of the horse. Bonus advice: Don’t forget the put a filter on your lens! Stables tend to be quite dusty. Always have a lens cloth on you as well. 7. Use Burst Mode and Continuous FocusAs much as the gear matters, how you use it matters more! Much like photographing any animal, there are certain settings that I’ve found work great. 6. Don’t Forget Detail ShotsAs much as full body or portrait photographs are wonderful, don’t overlook the details. The awesome thing about photography is its ability to bring light to something that goes otherwise unnoticed. 5. Choose Backgrounds WiselyA fundamental tip for any type of photography, be mindful of your background. If your background is too similar in colour to your subject, your image falls flat. It is the contrast between foreground, subject, and background that creates interest. 4. Consider the Type of Horse You’re PhotographingDifferent horse breeds have different specifications. This is particularly important if you want to step into the world of horse shows. 3. Ears UpEars up, up, up! This is true for many types of animal photography, from dogs to rats. Ears up make the pet look alert, happy, and engaged. With horses, many owners will not use images with their horse’s ears down. 2. Tension Poses Look the BestHorses are known for their elongated necks and muscular physique. Tension is the key for good portrait shots of horses. 1. Learn to Direct HorsesLikely the make-or-break part of your photo session. Due to their massive size and location limitations, there may be complex shooting situations.
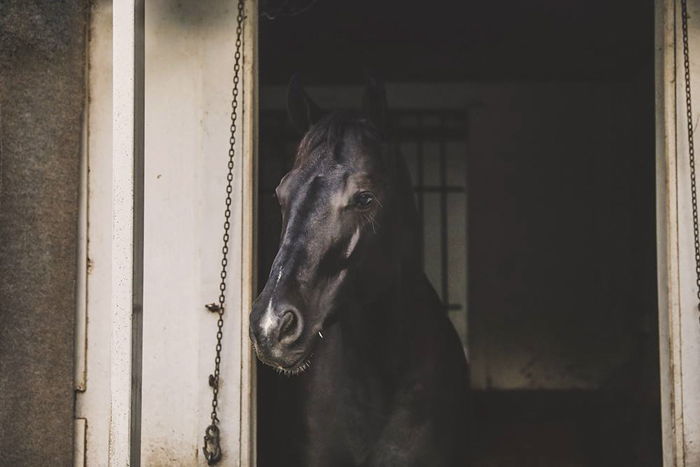
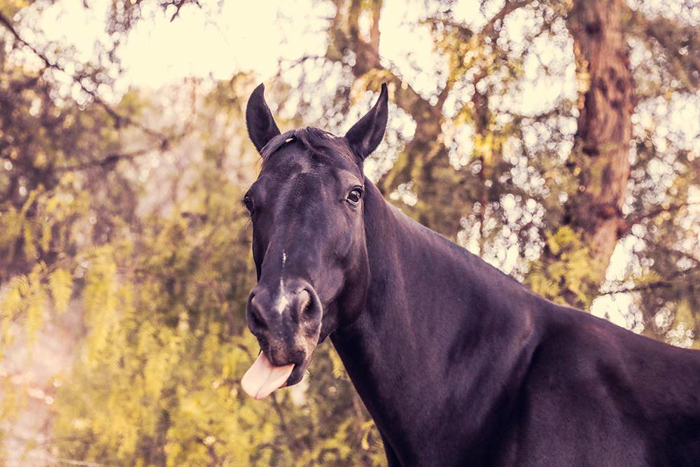
Bonus: Show the Horse’s PersonalityAt the end of the day, the horse photos that speak volumes are those that capture the soul of your subject. This means not being afraid of candid and personality horse photos!
Want to learn more about taking breath-taking photographs? Check out our Wow Factor Photography course! 
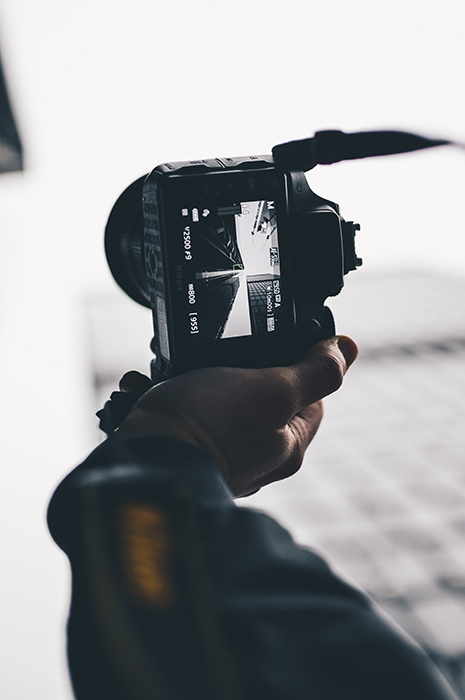
via RSSMix.com Mix ID 8230553 https://ift.tt/2u4L2xM Hyperlapses and time-lapses are similar but work very differently. You can think of a hyperlapse as a more dramatic and cinematic version of a time-lapse. Read on to see what hyperlapse is and how to create one.  
What Is a Hyperlapse?A hyperlapse is often confused for time-lapse photography. To clear things up, here’s a basic overview: You always need a tripod for time-lapse photography. This isn’t necessary in hyperlapse photography because you need to move around a lot. A tripod would help, but it would also take up a lot of time. Most hyperlapse photographers shoot handheld.
Hyperlapses look like they’re moving around, away from, or toward a subject. Time-lapses remain fixed in one spot. Hyperlapses tend to look more exciting than time-lapses because they have a more cinematic feel. Here’s an example of a popular hyperlapse. Hyperlapse photographers are limited to what they can shoot. Since they have to move around a lot, they need to shoot in wide and open spaces. You’ll notice that many hyperlapse videos focus on buildings in empty spaces. In time-lapse photography, you can shoot almost anything from one fixed spot. How to Make a HyperlapseChoose a Location With Lots of SpaceYou’ll need to move around quite a lot to make a decent hyperlapse. To achieve this, you need to shoot in a location with lots of space. Ideally, there should be lots of flat land so you don’t accidentally trip during your photoshoot! The location you choose depends on the kind of movement you want to have in your final results. Pick a location that fits your style and one that is suitable for creating a hyperlapse.
Make Your Hyperlapse Look Surreal by Choosing a DirectionHyperlapses are pretty versatile when it comes to movements. The most common motions are:
If this is your first time making a hyperlapse, it might be a good idea to choose only one motion. Watch a few hyperlapse videos to figure out what kind of motions appeal the most to you.
Shoot in RAW and Manual Mode to Have Full ControlRAW mode preserves image data. This makes it easier to edit photos. RAW images are larger than JPEG images, so keep your memory card space in mind as you take photos. Manual mode gives you full control over your camera settings. This ensures that all of your photos look consistent. Manual photos take more time to perfect than automatic photos, but they tend to look more professional.
Select a Focal Point to Keep Your Compositions StableHyperlapses depend on focal points to look stable. Since you’re going to move a lot, you need a fixed point that will help you take consistent photos. Before you start to take photos, look at your subject and find a focal point that you can focus on at any point during your photoshoot. This can be the edge of a roof or anything that really stands out. This isn’t possible to do with every subject. If your subject doesn’t have any focal points or moves around a lot, you’ll find it harder to create a smooth hyperlapse. This is why many hyperlapse photographers shoot buildings or objects with sharp edges. This doesn’t mean you can’t break the rules and experiment with other kinds of subjects. However, be open to starting with simple buildings. This will help you get a feel for hyperlapse photography quickly. From easier subjects, you can step-by-step move on to more complex ones.
Use Grid Display to Keep Your Focal Point in One PlaceOnce you have a focal point, you need to keep it in one place. If you’re planning to use a tripod, this will be easier to do because your camera will always remain at the same level. If you’re going to shoot handheld, you’ll need some extra help. Make sure you turn on grid display and shoot in Live mode. You can align your focal point with one of the intersecting points on your grid, or you can use one of the grid lines as a guide. Whatever you do, you need to make sure your focal point is always held in one position, no matter where you move.
Take a Photo with Every Step to Create a Motion EffectThis is when you get to create your very own hyperlapse! Switch to RAW and Manual mode. Adjust your camera settings to make your subject look as appealing as possible. Start at any point you like. Make sure you have enough space to move toward, away from, or around your subject. Take a photo at this point. Take another step, align your subject on your grid display, and take a photo. The amount of photos you take depends on the distance you need to cover. If your subject is far away, you can take one photo every few steps. If it’s nearby, take a photo every time you take a step. If the weather changes during your photo shoot, make sure you adjust your camera settings accordingly. Also, make sure your steps are consistent to avoid a choppy hyperlapse. The cleaner the result, the better.
Take Your Hyperlapse to the Next Level With EditingYou’ve probably come across hyperlapse tutorials that used complicated techniques to achieve perfect results. You don’t need to worry about being technically perfect. Most hyperlapse photographers use a combination of Lightroom and a video editing program. Lightroom is optional, but it can help you enhance your photos in bulk before you start editing them. You can use it to colour correct your images, remove unwanted details, or add more clarity to your shots. When you’re done, import your photos into an editing program of your choice (e.g. Adobe Premiere Pro). You have to import the files as an image sequence. Ideally, the images should be named in alphabetical order so the program can import them correctly. Most video editing programs have something called Warp Stabiliser. This will automatically fix any shaky hand movements and make your final video look stable. Don’t forget to add music and a logo to your hyperlapse for even more professional results.
Common Hyperlapse QuestionsHow Do You Hyperlapse a Picture?You need a series of photos. First, choose a focal point and a direction. For example, you might want to photograph a building as you move towards it. Take a photo every time you take a step forward. You can then merge all these photos to make a hyperlapse. What Is the Difference Between Hyperlapse and Time-Lapse?A hyperlapse and a time-lapse are both made of pictures. The difference is that a time-lapse is usually made from one fixed location. A hyperlapse is made by taking photos of the same location from various distances. You need to move for a hyperlapse. For a time-lapse, you can stay in one place. What Is Hyperlapse Used For?You can use a hyperlapse for a number of things. Commercial use is one of the more popular ones. There are many video agencies that buy hyperlapse footage. But you can also use hyperlapses to improve your videography and build a film-making portfolio. ConclusionHyperlapses tend to be more immersive than time-lapses. You can create them by taking photos of a subject from different distances. To make your final results look stable, you need to have a focal point and use a grid display. Last but not least, don’t forget to edit your results and use the Warp Stabiliser to make your hyperlapse look smooth. Check out our post on how to choose the best time-lapse interval next!
Save this article to your Pinterest profile to access it later!

via RSSMix.com Mix ID 8230553 https://ift.tt/39grzxB We’re all familiar with natural light. But have you ever actually stopped for a moment to think, “how is natural light used in photography”? You can take breathtaking photos using natural light. But what does natural light mean in photography? Read on to understand how to use natural light in photography. Check out our complete guide to photography lighting here.
 
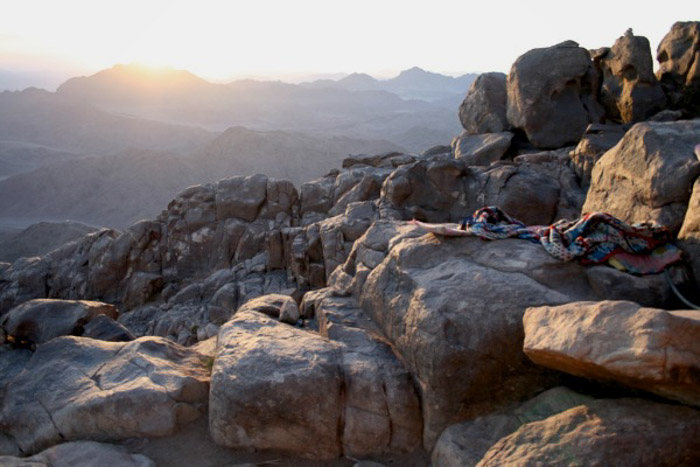
13. Try to Shoot in the Morning or EveningYou might have heard before that you shouldn’t be shooting in the middle of the day. Even though the sun is bright, it’s hard to control and has a very harsh appearance. So you might be asking, “How do I find good natural light for photography?” The best source of natural light is either the sunrise or sunset. Mornings and evenings offer the softest light as the lower sun casts softer shadows. Morning has the added advantage of being quiet. This allows you to capture a lot of the natural light’s progression along with the sun. Because the sun is coming in from an angle, you’re left with a lot of shadows.
I’m not much of a morning person. So the majority of my natural light photography occurs in the evening. This is especially true if I’m working during the day. This time of day is when you get some fantastic sunsets to work with. If you’ve read my post on photography cliches, you’ll know that I warn beginners against shooting sunsets. Part of the reason for this is that there are much better things to be shooting at that time of day. When you’ve got a good subject, the soft evening light will flatter their features. This will make for some really cool natural light photography. The photo below was shot in the evening with no direct light from the sun. The dynamic range has vastly improved because of it.
12. Shoot With Hard Light at NoonWhile the light in the morning and evening is easier to work with, shooting at midday can also be used effectively. The sunlight at that time of day creates hard light that offers many possibilities to play with harsh shadows. For example, in the image below, the contrasting shadow adds a strong compositional element that makes the photo much more interesting.
11. Photograph Magical Images at TwilightTwilight occurs during the transition between the day and night is happening. It is before the sun rises and after it sets. This time of day has a cool colour with diffused lighting. If it is almost night, you will have to rely on some artificial light as well. This picture was taken at the end of the day after the sun had already set.
10. Light Straight on SubjectSo we’ve established the best time to shoot. Now, choose the angle of the light. The first and most obvious option in regards to the angle of the light is to have it shine straight onto the subject. This provides very good outdoor photography lighting. In the photo below, the sun went down over my right shoulder. You can see how the soft evening light floods over my models face, casting a warm glow. Because the sun was low in the sky, there were no big and nasty shadows beneath the chin either. I like this photo but there are better angles to shoot the light from.
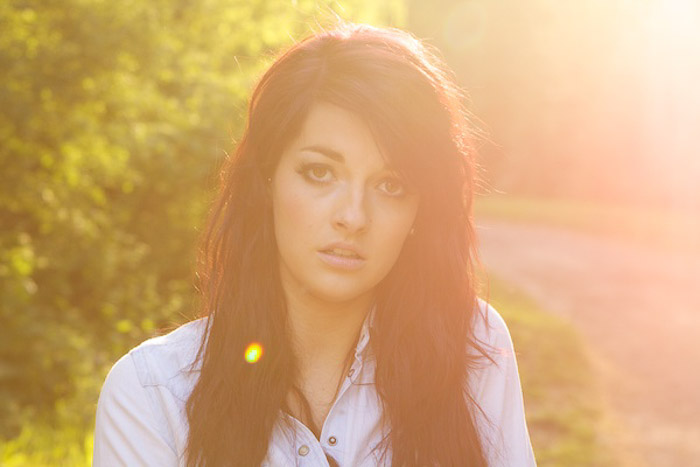
9. Shoot Into the SunShooting into the sun allows you some interesting lens flare. This produces some really cool shots. Here, the lighting on the face relied on the natural light still around in the sky. And it overexposed the lens flare so that the face was not underexposed. I achieved this using spot metering. This photo is softer than the one above as the shadows are more subtle on the face. And the flare that floods the photo makes an interesting outdoor portrait.
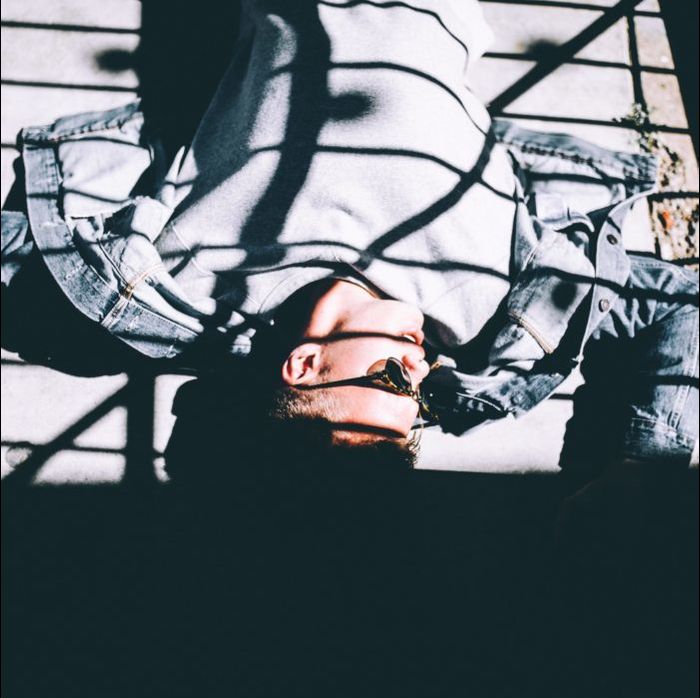
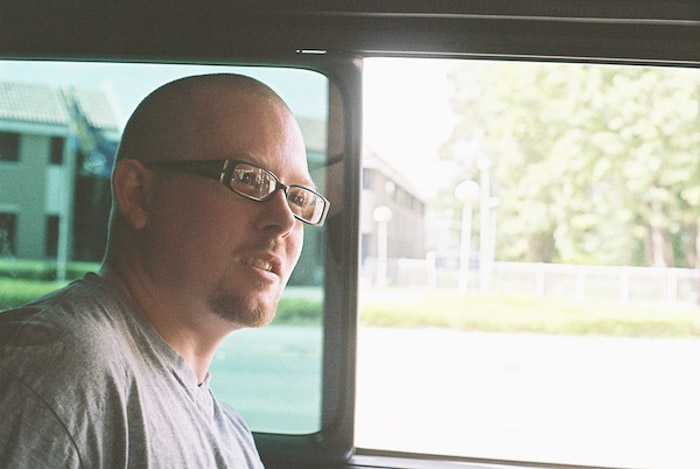
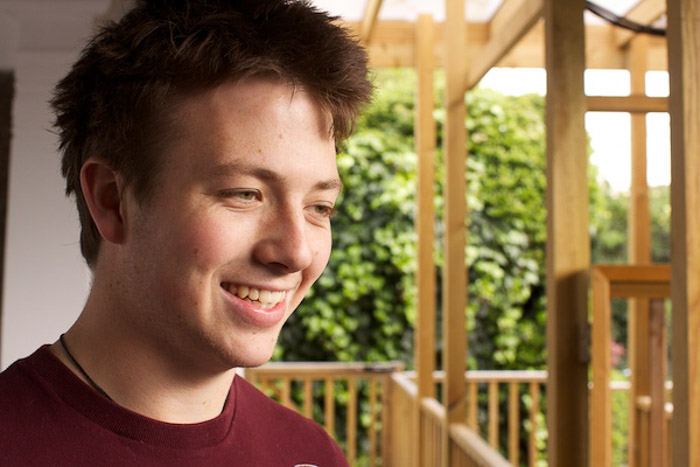
8. Experiment with Side LightingThe final major option when shooting natural light portraits is side lighting (see the photo below). It has many uses. You can get your model to adjust their angle until you find the most flattering light. Sidelight is particularly effective on flat but slightly curved surfaces. Like the model’s stomach. It helps to give natural light photography a soft touch. This is one of the best outdoor photography tips we have. So go ahead and use it to your advantage. Side lighting is the most adaptable but it’s also the easiest to get wrong. In this case, the side lighting on the model’s nose casts an ugly, sharp shadow on the side of her face. 7. Learn to Use Natural Light IndoorsWindow lighting is probably my favourite indoor photography lighting. You can use it for anything. It’s a form of side lighting and heavily dependant on the distance from the light source. This makes it easy to manipulate. If you have a look at my first subject below, you’ll see that he is very close to the window. The photo captures a lot of the light that passes through it. One side of the face receives a lot less light but because the vehicle we were in was well lit. The shoulder next to the face had a light on it. This means that the subject was still well lit with natural feeling shadows.
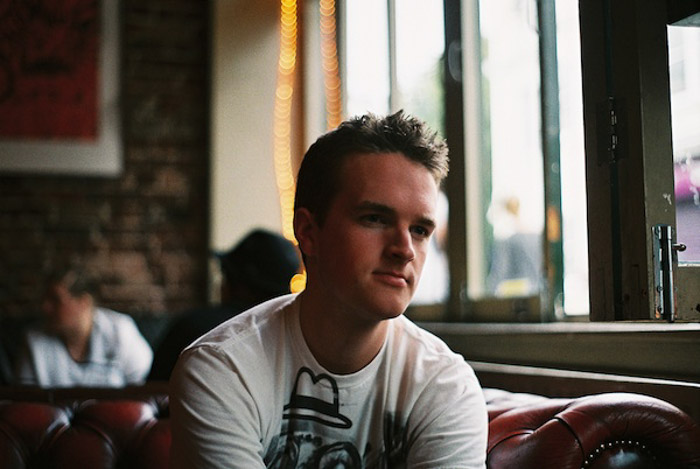
Compare the photo above to the one below. You’ll notice that the subject is actually about 2 foot further away from the window. Light disperses about the room, spreading the light about, as this distance increases. This has resulted in a much darker photo and a stronger contrast between the two sides of the face. The window frame to the right of the photograph gives it a nice balance, whilst the contrast on the right-angle of the open frame emphasises the light passing through the window. Using the natural light in this manner is one of the best indoor photography tips we can offer.
If you’re dealing with indoor photography lighting, we’re mostly talking about light coming through a window. Whether the subject is near one or not. Part of the reason why these photos look so soft is that the photographer is stuck using a wider aperture. This is because they need to capture enough light for a well-exposed picture. The photo below was set to f/2.8, which was all the way open on my lens. You can tell that it was very naturally lit. I still would have preferred some lighter conditions. Natural light can be the best way to brighten a subject, yet there are problems when shooting indoor photography.
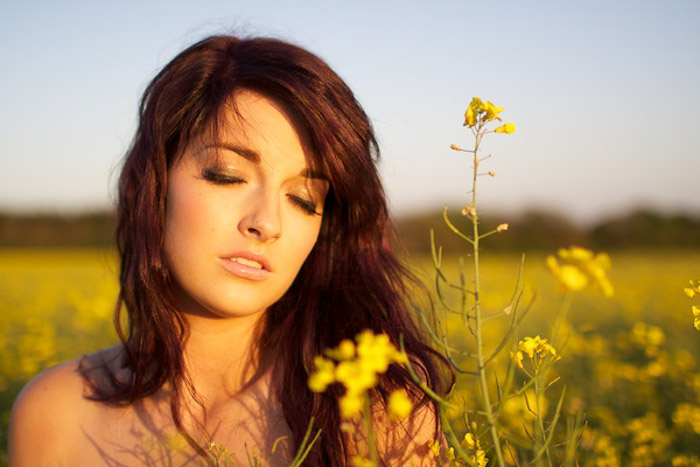
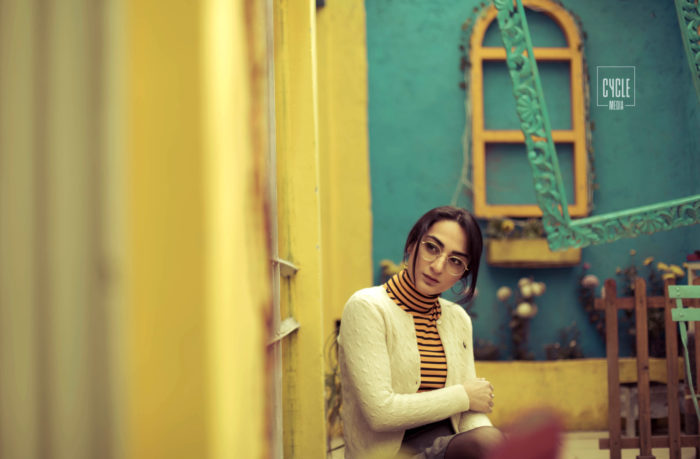
6. Look for Reflected Natural LightNatural light that is reflected off of surfaces can change an entire photograph. It can be reflected off of walls, the ground, or any other surface. This reflected light creates a soft glow. When the sky bounces light off the surfaces on the ground, the colour of the entire scene starts to change. This is demonstrated in the photo below. The light bouncing off the yellow walls casts a reflection on the girl’s face.
5. Make Your Photos Unique with Dappled LightAnother way to capture beautiful images with natural lighting is to use dappled light. Dappled light is the result of sunlight that shines through tree leaves to create interesting patterned shadows.
4. Switch Off the LightsIf you are shooting indoors, switch off any lights. Artificial lights don’t mix well with natural lighting. This can have a negative effect on the white balance and create unnatural skin tones. The best way to avoid this is to switch off electric lights.
3. Use a Polarising FilterSometimes you have to shoot in the middle of the day. While the lighting is hard to work with during this time of day, it would be a shame not to use the time to get some decent photos. If you know how to handle the lighting, it ceases to be a problem. In this case, you can use a polarising filter, an important tool in softening hard light. Here’s a portrait shot in direct sunlight diffused by a polarising filter.
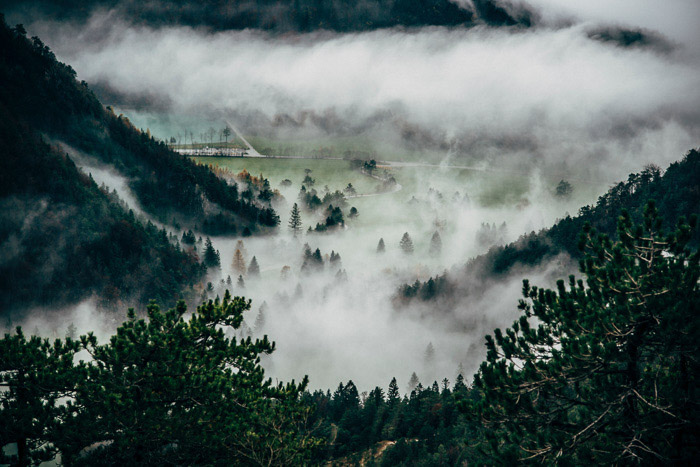
2. Use the Weather to Your AdvantageA common mistake beginners make is thinking that they can’t go out shooting when it’s raining or overcast. This is a myth. Whether it is sunny or cloudy, there is a chance to photograph every day. You have to take control of the situation and depending on the type of natural lighting available, you can create something amazing. If you are prepared to photograph at any time of the day, cloudy skies are a fabulous source for lighting in photography. Overcast lighting is much easier to work with and can produce equally interesting photos. For outdoor photography portraits, this is a great tip. Take the photo below, for example. It evokes feelings such as bleakness and coldness. These are feelings that prove a lot harder to evoke in bright sun. The similarity between the colour of the sky and sea on an overcast day gives this photo a lot of its strength.
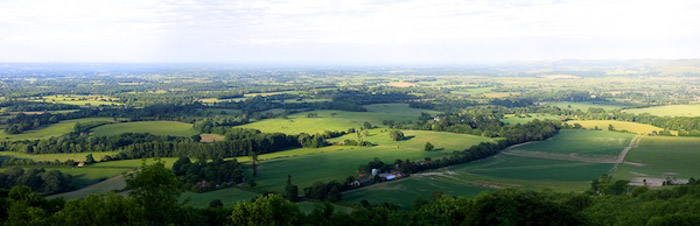
Always check the weather forecast before you go out shooting. If there’s going to be rain followed by some bright sunshine, this is a great time to shoot landscapes. Here, shadows cast by the clouds can be captured. The photo below would have been boring had it not been for the dynamic changes in the green colour. These help to emphasise the bumpy nature of the hills ahead. This is a very basic example of what I’m talking about; have a play for yourself and link us to some of your results.
No matter the weather, photos taken under evening light all start to look very similar. Not only do the brightness and dynamics change but so does the colour. I shot this on a slightly overcast evening, just before the sun went down.
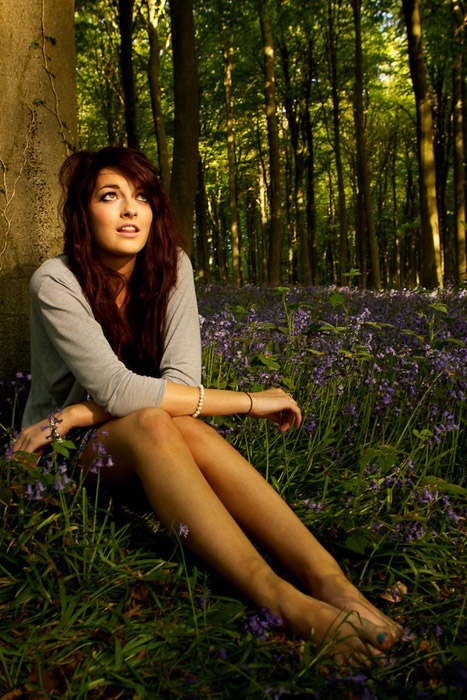
1. Diffuse Natural LightIf you find yourself in unfavourable photography lighting conditions, always try to diffuse the light by whatever means possible. There are countless ways of doing this but I thought I’d show you one of my favourite techniques. I like to use the woods. The leaves reduce the amount of light reaching your subject. But they still provide gaps for some direct sunlight. In my photo below, the woods were well protected from direct sunlight. But they still allowed enough sunlight through to illuminate the woods. The model positioned herself by a tree and stretched her legs out, lit by the ambient light of the woods. She leaned forward so the light was shining on to her face, producing a diffused effect. This resulted in one of my favourite photos of the set. Here it is. As you can see, this is one of the best outdoor photography tips when using natural lighting.
You can also use a reflector to diffuse some light or shoot in any shaded area. Common Natural Light QuestionsWhat Are Some Examples of Natural Light?In general, natural light comes from sunlight. It also includes ambient light, which is the light available in the environment. For example, this is can be the light from outside that brightens up a room. How Do You Take a Natural Light Selfie?Don’t take a photo with harsh lighting. Hold the camera a bit higher than your face level, which will even out the lighting. Stand near a window where there is diffused lighting for the most flattering results. Aim to take your selfie during golden hour, which is the first and last hour of sunlight each day. ConclusionWithout light, photography is impossible. As a photographer, you have the option of choosing artificial light or natural light as your light source. There are numerous ways of playing with natural lighting. Whether it is the time of day or the angle of the light, different types of light in photography create different results. Want to learn more about basic photography techniques? Check out our course Photography for Beginners!
Save this article to your Pinterest profile to access it later!

via RSSMix.com Mix ID 8230553 https://ift.tt/2ii7stH A surprising number of photographers never write a photography business plan. If you plan to embark on a career as a freelancer, you need a plan. A business plan is a road map to success. It outlines your business-related goals and how you intend to achieve them. There is no need to have a very formal business plan. But the components of a traditional business plan can help you be more specific about your goals. This way, you are more likely to achieve them.
You may be asking: How do I write a photography business plan? I have created a list of points you need for your photography business plan. I recommend you outline the following sections in great detail. Each section should be about 1-3 pages long. The Components of a Photography Business PlanCreate an Executive SummaryThe Executive Summary is where you define your photography business. What will be the legal structure of your business? Will you be operating as a sole proprietor? This is an overview of your business. It lays out how your business will meet the needs of your target clients. It’s helpful to write out a mission statement for your photography business. You should have tangible objectives and the keys to success. Write a Product and Service DescriptionYou need to create a detailed description of your photography services and products. What is the focus of your business? What stage are you at in terms of developing your business? When I wrote my business plan, I determined that I would shoot editorial and commercial food projects. I would also do mentoring and workshops. I added these to my service description. If you’re offering prints or albums, this would be a part of your product description. Consider Your Target MarketStart with some research about the photography industry and photography businesses in general, as well as in your area. This will help you narrow down your target market. Who are you going to serve? Come up with some examples of your ideal clients. Find out as much as you can about them so you can market to the right people. It’s helpful to create a client profile and marketing plan so you can understand your potential audience. Before I wrote my food photography business plan, I thought everyone was my client. Food is such a broad niche. I reasoned I could shoot for all types of clients, from restaurants to stock agencies. This type of thinking is not helpful. You need to narrow things down if you want to be successful in your photography business. When researching your target market, look at the size and present status of the market. Identify any trends for the future. Ask yourself if this market is accessible, affordable, and achievable. If I had focused all my attention on high-end restaurants, I would have failed. There are not enough in my area to keep me busy. Nor does restaurant photography pay as well as commercial photography. So, I had to include other kinds of food photography clients in my target market. Assess the CompetitionYou should find out who your main competitors are in your target market and demographic area. Research them and determine how your photography services will compete and differ from them. There is something unique that will set you apart from your competition. It can be difficult to pinpoint, but you need to determine what it is. This difference will affect your branding and marketing strategies for your business. As a word of caution, never differentiate yourself on price. Trust me; you don’t want to be known as the “the cheap photographer”. Develop Key Marketing StrategiesOnce you have worked out who you will market to, you need to come up with some strategies. What activities will you undertake to get your name out there? I often send a PDF of my recent work to advertising agencies and publishers. A commercial photographer may want to include external promotion in photography business marketing. Many successful commercial photographers no longer use agents who charge hefty commission rates. Instead, they pay to be included in high-profile directories. There are also production service companies that promote your work and connect you with clients. They help ad agencies, brands and publications to produce photoshoots. They also provide photographers with marketing support. If you shoot wedding photography, you can connect with bridal boutiques and hair salons who might cross-refer business. If you do architectural photography, network with real estate agents. Consider Your Operations StrategyIn this section, you can break down where you will be operating your business in more detail. Many portrait and product photographers have home-based studios. If you’re a commercial photographer with clients and creative directors, you need to rent a studio. Depending on what kind of photography you do, you might not need to rent a studio on a monthly basis. As a food photographer, I often shoot on location at restaurants. When I do commercial and packaging work, I rent a local studio for the day. Think about your niche and where you will be shooting most of the time. Plan the FinancialsThis part of your photography business plan is where you will focus a lot of your energy. You should spend considerable time determining what equipment you will need and how much it will cost. Most likely, you will need to spend quite a bit more in this area in your first year of business. When you are shooting professionally, you need to have two of everything in case of technical issues. You even need two cameras. I once assisted on a shoot where the photographer’s camera stopped working for no reason. Luckily he had a couple of backups. He would have been in big trouble with the client waiting on him and no functioning camera! You might need an assistant on your shoots. How much will you pay them? How much money will you need to get started and survive until you have a positive cash flow is reached? Where will the money come from? Finally, set up your pricing structure, depending on the type of photography you do. If you shoot portrait photography, you may want to offer packages. If you shoot commercial photography, you may opt to have a day rate and charge for image usage. At first, your pricing structure will need flexibility so that you can build up your client list. Be sure not to start too low. It’s difficult to raise your prices once you are more established. SWOT AnalysisSWOT stands for strengths-weaknesses-opportunities-threats. This component of your photography business plan will take some analysis on your part. When you compared yourself to the competition, you thought of what made you unique and different. Most likely, you came up with several strengths. You may also have advantages that you can make work for you. When I first started my business, I got a lot of work through a relative who owned a branding agency. The work was not related to my niche, but it gave me experience in professional shoots. And I was able to start earning money right away. Another strength I identified was that I had hundreds of images to license through stock agencies. This came from years of practising my food photography. I was able to start earning passive income in my business with very little extra work. Think of what gives you an advantage in your business right now.
Your weaknesses are areas for improvement. Perhaps areas where you need to build up your skills. A weakness can be a lack of experience or technical knowledge. It is important to be aware of this so you can make these weaknesses part of your goal setting. This way, you can make strides to improve in the future. Opportunities mean chances for developing your photography business. Are there trends you might take advantage of, such as changes in technology or social factors? Threats are the challenges that can undermine your business or be serious obstacles on your path. It could be that most of your competitors are already well established. They have their own studios and twenty years of experience under their belts, as was my case. Your main obstacles could be rapidly changing trends. Or the constant need to update your technology, which can be very costly. Make a TimelineA timeline is a management tool. You can use it to hold yourself accountable for your actions and change it as required. I strongly suggest writing a timeline for your business. The key to knowing which challenges are next for your business is to map them out in a timeline. Then, you can add it to your action plan. It helps to do a rough timeline on a monthly basis and then refine it as time passes. Your timeline can consist of marketing and financial, legal, and operational activities. You don’t need to get complicated. You can simply write down a task you need to complete and the date you aim to complete it by. Start by writing a timeline for the first three months of your business. Here is a sample timeline: ConclusionPreparation and goal setting are crucial to success in any business. A plan for your photography business can make all the difference. Start today by working on your photography business plan. If you can set aside 30 to 60 minutes a day, you’ll finish before you know it. And then you’ll be far ahead of most photographers, who have no plan whatsoever! Now you’ve worked out how to make your business plan, check out our posts on how to price your photography services or use social media marketing next!
Save this article to your Pinterest profile to access it later!

via RSSMix.com Mix ID 8230553 https://ift.tt/2BIQ8XB |
AuthorWrite something about yourself. No need to be fancy, just an overview. Archives
October 2021
Categories |

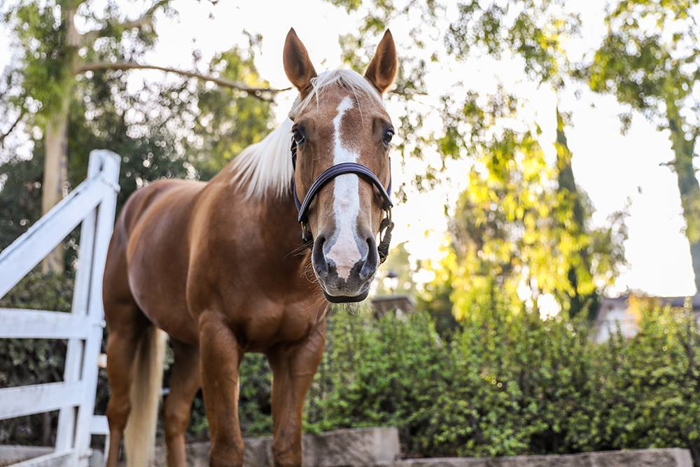
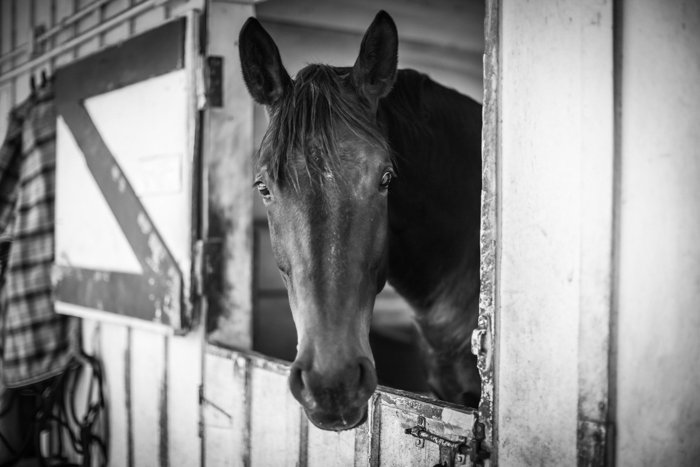
 You have to remember that horses are prey animals. If you are acting uncomfortable, fearful, or anxious, they will become nervous as well.
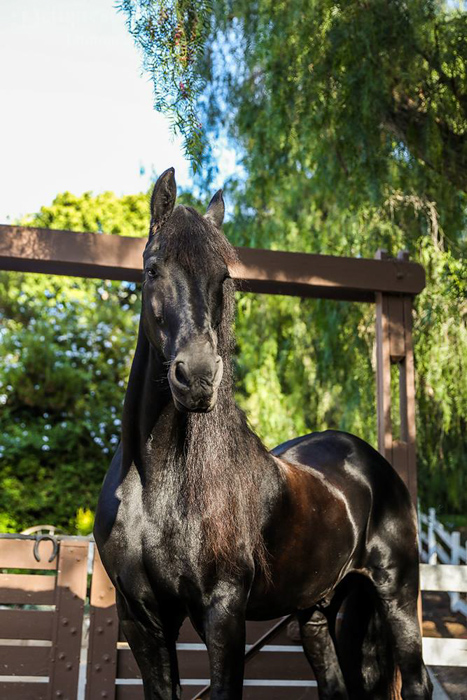
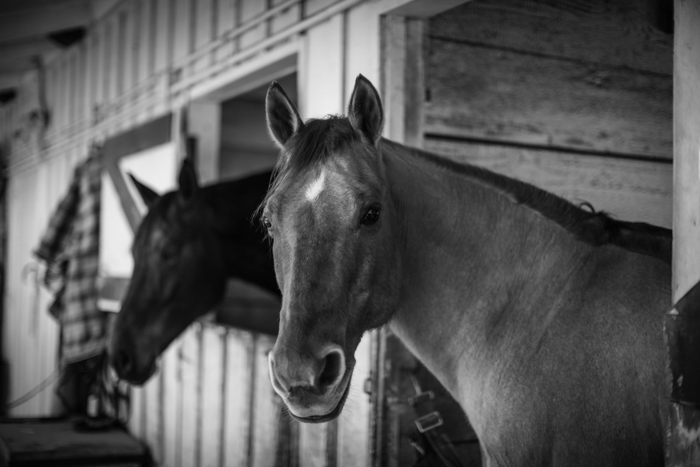
 If you are photographing horses in action, panning will be your best friend.
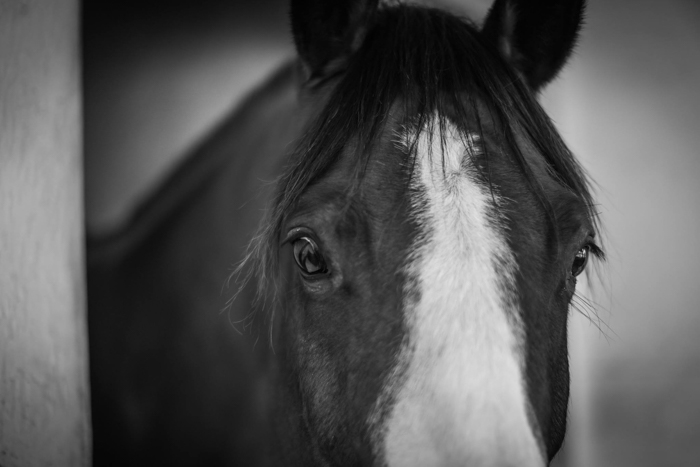
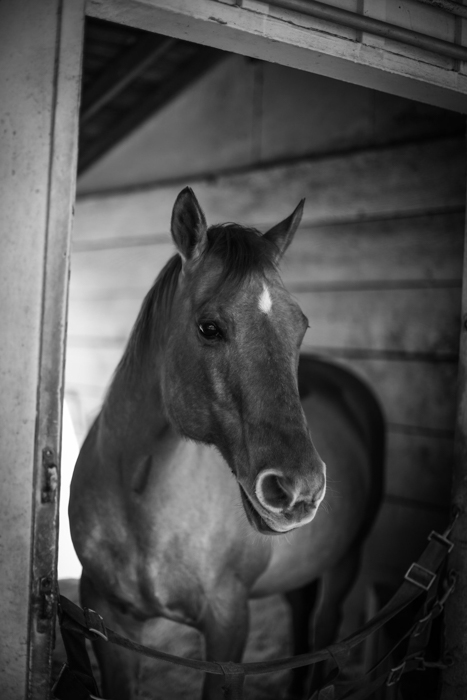
 If taking a posed horse photo, be very clear on where you need the horse to stand or look. Pay close attention to
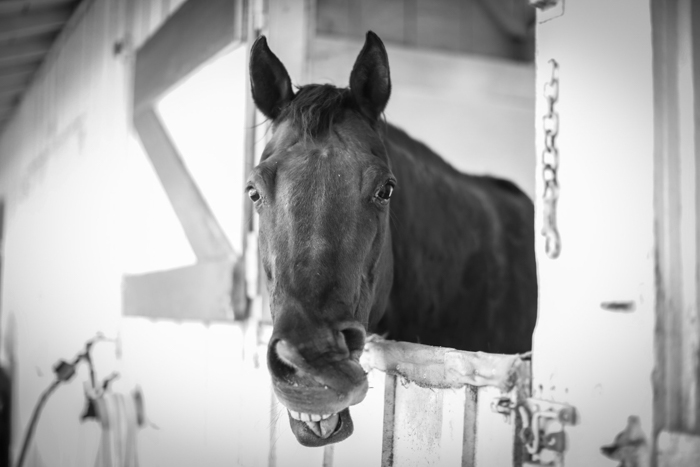


 [Note: ExpertPhotography is supported by readers. Product links on ExpertPhotography are referral links. If you use one of these and buy something, we make a little bit of money. Need more info?
 I soon realized that my target market was high-end restaurants, marketing agencies, and book publishers. This is where I still focus my marketing plan efforts.
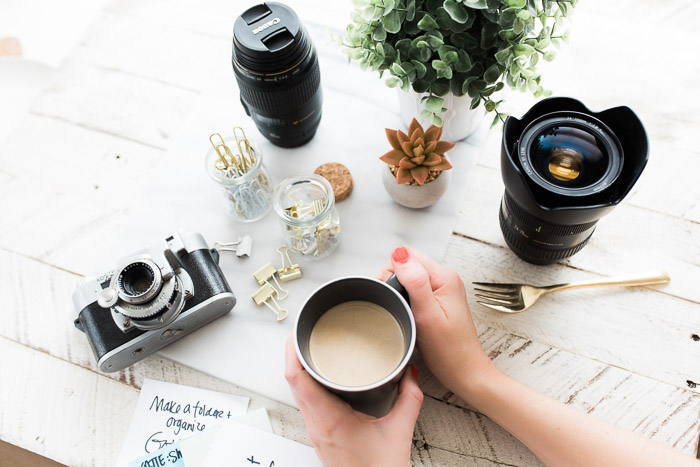

 When doing your financials, try to project what your expenses and income will be for your first three years of business.

 Once you complete your SWOT analysis, identify what you need to tackle immediately. See what needs further research or future planning. You should create an action plan to ensure that you address these challenges.
 RSS Feed
